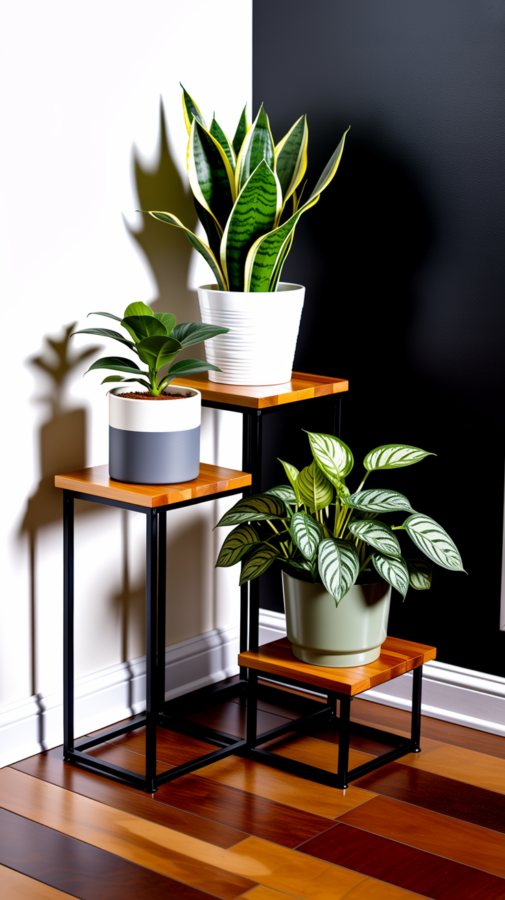
If you have a tiny bathroom and love plants, you know the struggle. Counter space disappears fast, and the windowsill usually holds just one small pot. That is exactly why I built this DIY tiered plant stand from scrap wood. It gave me three levels of greenery without taking up any counter or floor real estate. The best part? The entire project took less than an hour, cost almost nothing, and looks like something you would buy at a home decor store. Let me show you how easy it really is.
Why a Tiered Plant Stand Works So Well in a Small Bathroom
A tiered stand uses vertical space instead of horizontal. That means you can fit three or four pots in the footprint of one. Your bathroom counter stays clear for soap, toothbrushes, and lotion. The stand can sit right next to the tub or beside the sink. It turns an empty corner into a mini indoor garden.
Bathrooms typically have high humidity and lower light, which many houseplants love. A tiered stand lifts plants off the floor, away from splashes and foot traffic. It also makes watering easier because you can reach every pot without moving furniture. For small bathrooms, this is a game changer.
Gathering Your Scrap Wood and Basic Tools (What You Actually Need)
I built mine from leftover pieces of 1×3 pine and a small scrap of plywood. You do not need a big workshop or expensive tools. Here is exactly what I used:
- One 1×3 board, about 4 feet long (cut into three shelf supports)
- One 1×3 board, about 2 feet long (cut into two side uprights)
- Three small scraps of plywood or solid wood for the shelves (each about 6×10 inches)
- Wood glue and finishing nails (or screws if you prefer)
- A saw (hand saw or miter saw), a hammer or drill, sandpaper
- Wood stain or paint (optional, but I used a light whitewash)
If you do not have scrap wood lying around, a trip to the hardware store will cost under $10. Ask the staff to cut the boards for you in store. That saves time and makes the project truly beginner friendly.
Step by Step: Build the Frame in Under 30 Minutes
Start by cutting your two side uprights. I made mine 24 inches tall. Then cut three shelf supports, each 8 inches long. The shelves will sit on top of these supports, so the exact height depends on how tall you want each tier. I spaced mine about 7 inches apart.
Glue and nail the shelf supports to the inside of the uprights. Make sure they are level. Let the glue dry for 15 minutes. Then attach the three shelves on top of the supports. I used thin plywood pieces that I sanded smooth and stained. If your scrap wood is uneven, sand it well before assembly. That prevents splinters later.
The whole structure is basically a ladder with shelves instead of rungs. You can make it wider or narrower depending on your space. Just keep the proportions balanced so it does not tip. I recommend a base that is at least 10 inches wide for stability.
How to Choose the Best Low Light Plants for Your Bathroom
Not every plant will thrive in a bathroom. Most bathrooms have small or no windows, so stick with low light champions. My personal favorites are snake plants, pothos, ZZ plants, and peace lilies. They handle humidity and dim corners without drama. Ferns also work great if your bathroom gets some indirect light.
Avoid succulents and cacti unless you have a very bright bathroom. They rot quickly in steamy conditions. Instead, choose leafy green plants that love moisture. Here is a quick list of plants I have used on my own stand:
- Snake plant (Sansevieria) – nearly indestructible, grows upright, looks modern
- Pothos (trailing variety) – cascades down the stand, adds softness
- ZZ plant – glossy leaves, thrives on neglect, perfect for beginners
- Peace lily – blooms occasionally, tolerates low light, likes humidity
- Cast iron plant – tough as nails, handles dark bathrooms well
Styling Your Plant Stand for a Spa Like Vibe
Once your stand is built and your plants are chosen, it is time to style it. Do not just line up identical pots. Mix heights and textures. Put a tall snake plant on the top shelf, a trailing pothos on the middle, and a compact ZZ on the bottom. That staggered look draws the eye up and makes the space feel bigger.
Use pots that match your bathroom color scheme. White
#diyplantstand #bathroomdecor #smallbathroomideas #scrapwoodproject #indoorgardening
Leave a Comment